
Futomaki: Traditional Vegetarian Sushi
- Eiten

- Oct 28, 2025
- 5 min read
Yasai no Futomaki・野菜の太巻き
When most people think of sushi, they instantly envision perfectly sliced bite-sized pieces of raw fish draped over warm rice seasoned with vinegar, sugar, and salt. Soy sauce and wasabi to served on the side as a matter of course. What if I told you that there is a rich history of sushi made exclusively from vegetables in Japan?
Tosa inakazushi (Countryside sushi from Tosa) is a traditional vegetarian sushi that became popularly known outside of its place of origin, Shikoku Prefecture, in the mid-80s, but it has a long history in the region.
It's exact date of origin is uncertain. What is known is that It was born in the mountainous areas of the prefecture that had limited access to coastal waters and, as a result, limited access to products derived from the ocean. Necessity being the mother of invention, locals utilized what was readily avaiiable (vegetables) to create a rich tradition of intricate and visually stunning alternatives sourced 100% from the land, save the nori. The traditional seasoning for the rice is often augmented by substituting yuzu vinegar for rice vinegar, adding a subtle floral note to each bite.
This futomaki recipe is made in the spirit of this tradition.

Selecting Rice for Vegetarian Sushi
Choosing the best rice for sushi is critical. Choose poorly, and even perfect technique and premium ingredients can't save your futomaki. Choose well, and you're already halfway to success.
What Makes Good Sushi Rice?
Japanese short-grain rice (japonica) differs fundamentally from long-grain varieties. The higher amylopectin content creates the characteristic stickiness that holds sushi together without becoming gummy or mushy. When cooked properly, each grain remains distinct while bonding to neighboring grains. This "stickiness" is essential for rolls that slice cleanly and hold their shape.
Recommended Varieties:
Koshihikari (コシヒカリ): The gold standard for sushi rice. Slightly sweet, excellent texture, balanced stickiness. More expensive but worth it for special occasions.
Sasanishiki (ササニシキ): Traditional choice for Edomae-style sushi. Its lighter texture and flavor profile complements the delicate taste of other ingredients, making it a top choice of many professional sushi chefs. Harder to find outside Japan, but worth splurging for if you find it and your budget allows.
Calrose: California-grown medium-grain rice. Not technically Japanese but widely available and performs admirably for sushi. Budget-friendly option that delivers consistent results.
Tamanishiki: Premium short-grain blend combining California Koshihikari with domestic rice. Excellent quality-to-price ratio for home cooks.
Yumepirika: My personal favorite. It consistently scores high in tests performed by the Japan Grain Inspection Association due to its texture, balanced sweetness, and naturally occurring umami-enhancing compounds. Local to Hokkaido where I live, but if you live in the US you can order it from The Rice Factory. They import the grains themselves and polish to order, so you never have to worry about freshness.
What to Look For:
Check the packaging date—rice degrades over time. Look for harvest dates within the past year. The grains should be uniformly white without excessive broken pieces or discoloration. Store in an airtight container away from heat and moisture. Proper storage maintains quality for 6-12 months after opening.
What to Avoid:
Never use parboiled, instant, or long-grain rice for sushi. These varieties lack the starch structure needed to absorb seasoning properly and won't achieve the texture sushi requires.
What is Nori?
Nori (海苔) is the dried seaweed sheets that give futomaki its distinctive appearance and subtle aroma and taste of the ocean. More that that, it's also a nutritional powerhouse with a fascinating production process.
From Ocean to Sheet:
Nori begins as Pyropia seaweed. It is harvested from coastal waters, primarily in Japan's Ariake Sea region. After harvesting, the seaweed is washed, chopped, and spread onto bamboo screens in a process not unlike papermaking. The thin layer dries into sheets, which are then toasted to develop nori's characteristic flavor and crisp texture.
Quality nori shows deep green-black color with subtle iridescent purple sheen. Hold a sheet up to light like you are looking at an x-ray to inspect the sheets: premium nori appears uniformly thin without holes or thick patches. The texture should be crisp enough to make a crackling sound when handled, yet pliable enough to roll without tearing.
Nutritional Profile:
Nori delivers impressive nutrition in a nearly calorie-free package:
Iodine: Essential for thyroid function, one sheet provides significant daily requirements
Vitamin B12: Rare in plant foods, making nori valuable for vegetarian diets
Protein: Surprisingly high protein content (35-50% by dry weight)
Iron: Important for energy production and oxygen transport
Omega-3 fatty acids: EPA type typically found in fish
Dietary fiber: Supports digestive health
The combination makes nori particularly valuable for plant-based diets, addressing nutrients often challenging to obtain from vegetables alone.
Grades and Selection:
Nori is graded by color, texture, and uniformity. "Gold" grade (金) represents the highest quality—deep color, uniform texture, intense flavor. "Silver" grade (銀) offers good quality at lower cost and works perfectly for home cooking. Avoid nori that appears dull green, brownish, or shows irregular texture.
Store nori in its original packaging or an airtight container with desiccant packets. Exposure to humidity turns nori soft and chewy. Once opened, use within 2-3 weeks for best quality. If nori loses crispness, briefly wave sheets over a gas flame for 5-10 seconds to restore texture. I haven't tried it, but a food dehydrator on its lowest might also do the trick if you don't have a gas stove.
Key Points for Making Perfect Futomaki
Futomaki technique differs from thin hosomaki rolls. The thick diameter and multiple ingredients require specific approaches to achieve clean slicing and balanced bites.
1. Rice Temperature and Texture
Use freshly made sushi rice that is warm, but not hot. Never use rice that has been refrigerated. Cold rice won't spread evenly and creates hard, unpleasant texture. If making rice ahead, keep covered with damp cloth at room temperature for up to 2 hours. Use a wooden rice bucket (ohitsu) or plastic container: both are poor conductors of heat, minimizing the loss of heat from the rice.
2. Proper Rice Distribution
Leave a 1/2 inch margin at the top edge of your nori sheet completely bare—this becomes the seal. Spread rice in thin, even layer using wet hands or spatula (shamoji), pressing gently to eliminate air pockets without crushing grains. Think "even coverage" not "thick layer." Too much rice makes rolling difficult and creates unbalanced bites.
3. Ingredient Preparation
Cut all vegetables to uniform thickness—inconsistent sizes create gaps and uneven rolling. Remove excess moisture from cooked vegetables by patting with paper towels. Wet ingredients make soggy nori and prevent proper sealing.
4. Apply the Five-Color Principle Thoughtfully
Don't just pile the vegetables in randomly. Consider the following points when deciding on your final arrangement:
Structural placement: Firmer vegetables (carrot, cucumber) near the center provide structure
Color distribution: Alternate colors for visual appeal when sliced
Texture variety: Mix crunchy (cucumber), tender (spinach), and chewy (shiitake) elements
Flavor balance: Pair mild (kanpyō) with bold (pickled ginger) ingredients
5. Rolling Technique
Position ingredients in evenly spaces lines, starting about 1 inch from the bottom edge (closest to you). Using your bamboo mat, lift the bottom edge of nori and fold over the ingredients firmly, tucking them into a tight cylinder. Continue rolling forward, applying even pressure across the entire width using the mat as guide. Some suggest using a bit of water to seal the edge before finishing the roll, but I have found that to be unnecessary. The residual moisture and warmth of the rice are more than enough to ensure a proper seal. If you are wary, you can rest the roll seam side down for 1-2 minutes to help this along.
6. Slicing Cleanly
Use the sharpest knife you own—dull blades crush rolls instead of slicing them. Wet the blade with water before each cut, wiping clean between slices. Use a single smooth motion, drawing the knife through rather than trying to saw through it like a log.
1
Washing Vegetables
Wash all produce under cool, running water, using a clean vegetable brush (tawashi) for firm produce like carrots and burdock root to scrub away any soil from the surface. Dry on a clean kitchen cloth or paper towel.
2
Substitutions
You can play around with different types of greens and mushrooms, or swap out any of the other vegetables depending upon the season and what is available locally in your area. There are no hard and fast rules, just use the freshest ingredients possible to ensure the highest nutrient value in the finished roll.
3
Storage
These rolls can be made up to 24-hours in advance and refrigerated overnight. They make for a great lunch on the go, whether you are picnicking, hiking, or packing lunch to bring to work.
Notes


1
PREPARING THE VEGETABLES. Add the dashi, sake, mirin, soy sauce, sugar, kampyō, shiitake, and gobo to a 2 liter pot and bring it to a boil. Reduce to a strong simmer and cook for about 10 minutes. At this point add the carrot and continue to cook until the carrot is just cooked through. This will take about 5 more minutes. Once the vegetables are cooked, remove them from the pot and drain them on a clean kitchen towel. Set it aside.
2
BLANCHING THE SPINACH. While the vegetables cook, combine the water and salt in a separate pot and bring it to a boil. Trim the root end off of the spinach and rinse under running water to remove any residual soil. Add the cleaned spinach to the boiling salted water and cook for 1 minute. Remove the spinach and add it to a bowl of ice water to cool it down rapidly. Remove it from the ice water once it has cooled, and drain on a clean kitchen towel. Set it aside.
3
SEASONING THE RICE. Make the seasoning for the rice by adding the vinegar, sugar, and salt to a small pot and brining it to a boil. Boil it just until the sugar and salt are completely dissolved. Add the rice to a cedar rice bucket (ohitsu) if you have one. The wood absorbs excess moisture from the rice as you mix it, as well as adding a faint aroma from the wood. If you don't have one, just use whatever bowl you have on hand. Use a plastic spatula or rice paddle (shamoji) to gently fold in the seasoned sushi vinegar, turning the bowl as you do this to ensure that everything is evenly mixed. Set it aside.
4
ASSEMBLING THE FUTOMAKI. Lay out a sushi rolling mat, parchment paper, or plastic wrap to build the roll on. Start by arranging 1.5 sheets of roasted nori onto whatever you have selected. Wet the tip of your finger with a little water and run your finger along the top edge of the full sheet, then overlap the half sheet onto the full sheet by about 1/3" and press down lightly to stick them together. Next use the spatula (shamoji) to spread the seasoned rice evenly over the nori, leaving a 1/2" border at the very top (the edge farthest away from you). Make five evenly spaced lines crosswise in the rice: these lines are where you are going to arrange the vegetables. Arrange one vegetable per line, starting with the line closest to you: spinach, burdock root, carrot, shiitake, and kampyō. Use your hands to fold the edge closest to you towards the top of the roll, until it is aligned with the edge of the rice. Move the roll to the center of your rolling mat, and fold the mat over top of the roll, then gently squeeze the mat and pull it towards you to tighten up the roll. If you are using a bamboo sushi mat, I like to hold it from both sides like a hammock and alternately pull from side to side to help even out the shape of the roll. If you are using plastic wrap of parchment, you can achieve the same by using your hands to push the roll forward and backward on your cutting board. The roll can be wrapped and stored in the refrigerator at this point for up to 24-hours.
5
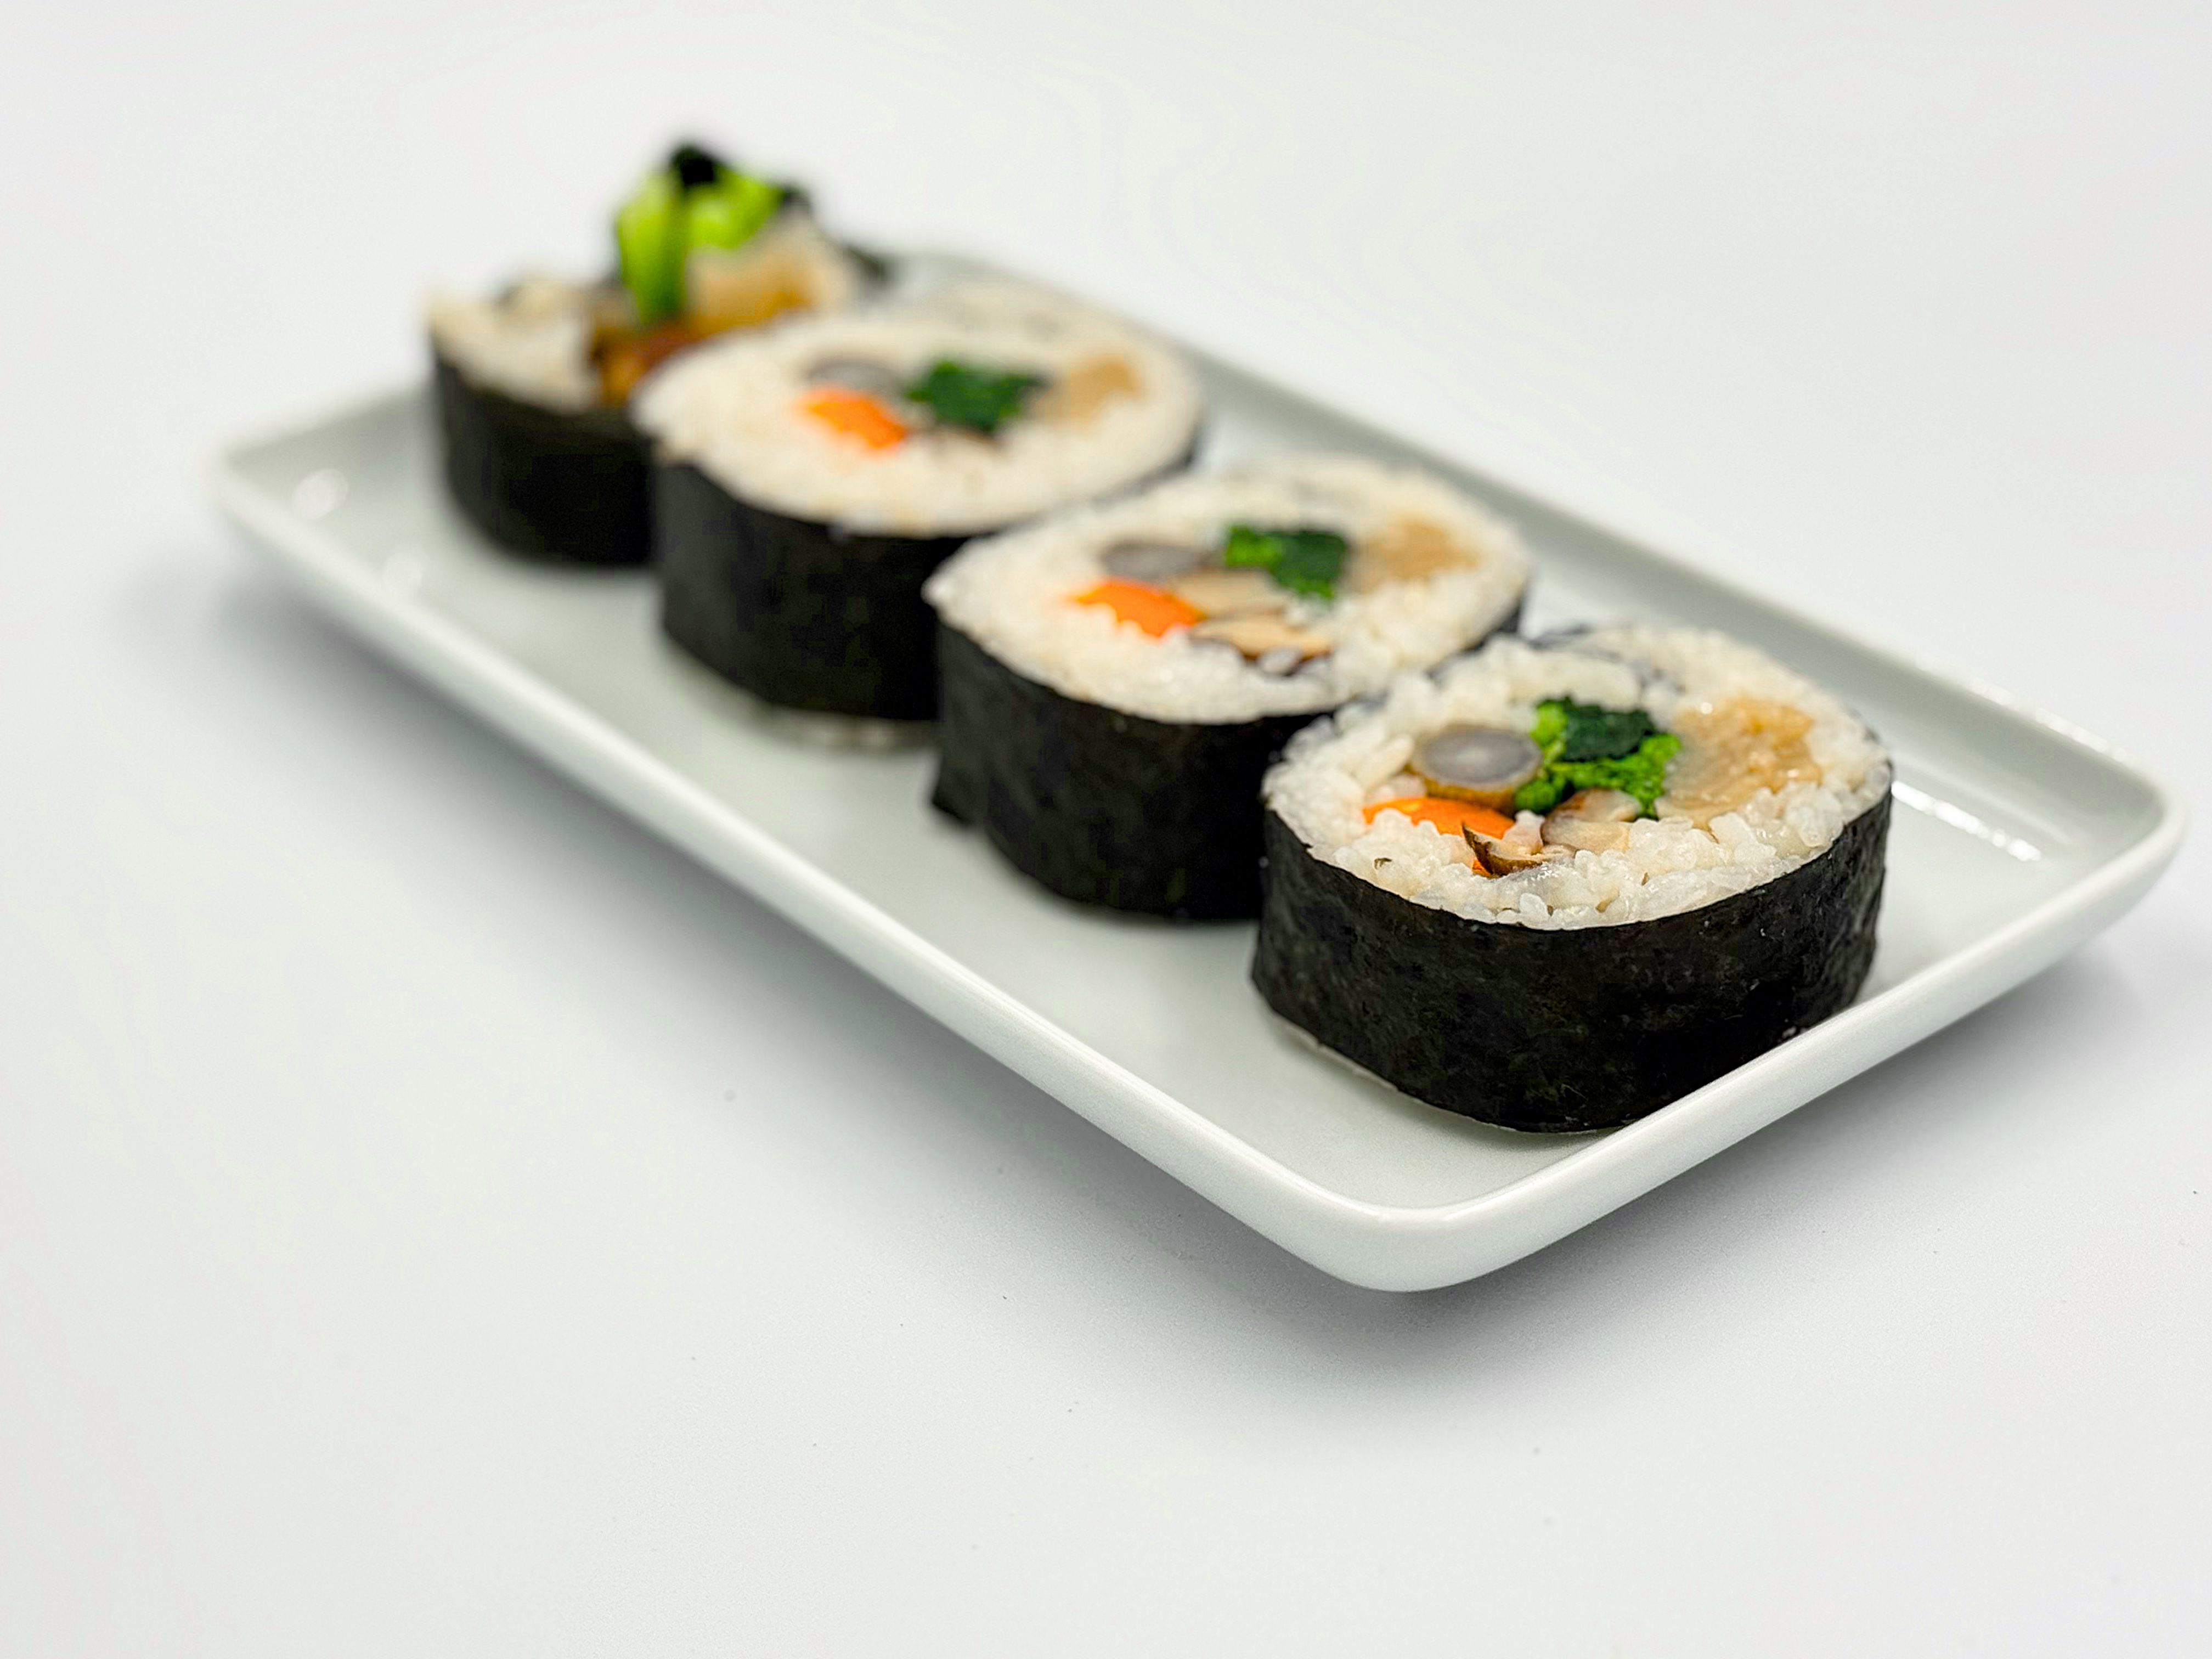
HOW TO SERVE. When you are ready to serve the maki, unwrap it and place it onto a clean cutting board. Using a sharp knife, cut the roll in half, then slice each half into four 1" thick pieces. Divide the pieces equally onto serving dishes, and enjoy as is or with small dab of wasabi. The rice and vegetables are well seasoned, so I recommend eating the roll without soy sauce so that you can enjoy the flavors as they are.
Instructions
500 grams Shōjin dashi
60 grams Sake
45 grams Mirin
30 grams Soy sauce
15 grams Sugar
10 grams Kampyō (Dried gourd)
5 grams Rehydrated Shiitake (Leftover from shōjin dashi)
30 grams Gobo (Burdock root)
20 grams Carrot
Preparing the Vegetables
50 grams Spinach
1000 grams Water
15 grams Sea salt
Blanching the Spinach
360 g Cooked Japanese short-grain rice
90 grams Rice wine vinegar
45 grams Sugar
20 grams Sea salt
Cooking & Seasoning the Rice
Cooked vegetables and spinach from above.
Seasoned rice from above
1.5 ea Roasted nori sheets
Assembling the Futomaki
Vegetarian Futomaki Sushi Roll・野菜の太巻き
Eiten

This futomaki recipe follows the "five colors" principle (green, yellow, red, white, black), an ancient shōjin ryōri way to build meals that aims to ensure complete nutrition while creating visual harmony. This combination of ingredients is widely known—somewhat of a standard—but once you master the techniques involved here, I encourage you to start playing around with what is available in your local seasonal markets or whatever you happen to have on hand.
Servings :
2 (One Serving = 1/2 Roll)
Calories:
About 300
Prep Time
15 min
Active Cook Time
30 min
Passive Cook Time
45 min
Total Time
90 min


Comments